Install SSL certificate on Windows Server involves several steps, including generating a CSR, submitting it to a Certificate Authority (CA), and installing the certificate.
Here is a detailed guide to help you through the process:
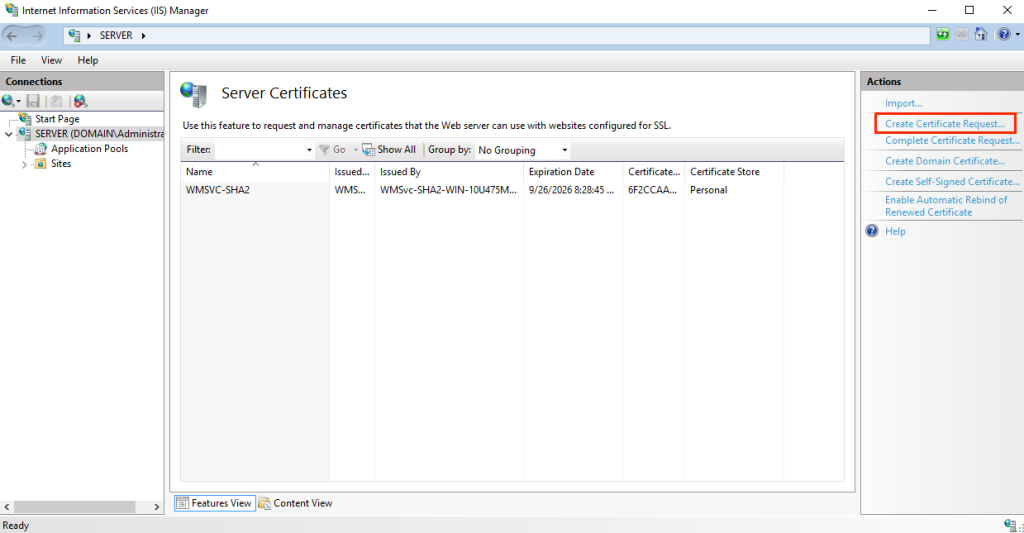
Step 1: Generate a Certificate Signing Request (CSR)
- Open IIS Manager:
- Click
Startand pressEnter.
- Click
- Select the server name:
- In the
Connectionspanel, click on your server’s name.
- In the
- Open Server Certificates:
- Double-click on the
Server Certificatesfeature.
- Double-click on the

- Create Certificate Request:
- In the
Actionspanel on the right, clickCreate Certificate Request.
- In the
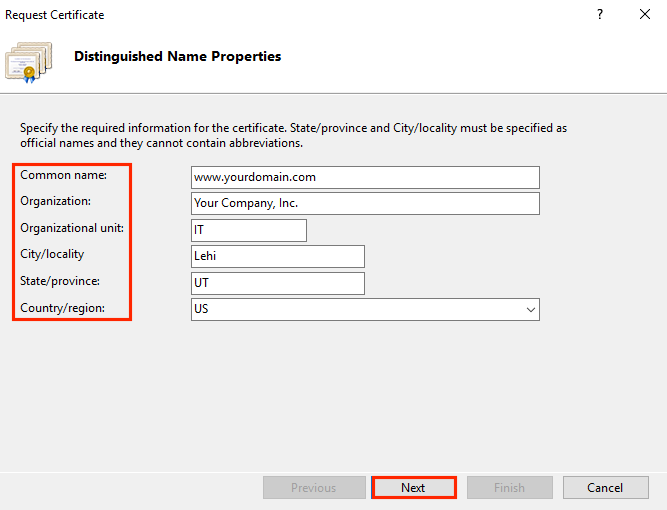
- Distinguished Name Properties:
- Fill in the requested information:
- Common Name: The fully qualified domain name (FQDN) for your site.
- Organization: Your company’s legally registered name.
- Organizational unit: Your department’s name within the organization.
- City/locality: The city where your organization is located.
- State/province: The state/province where your organization is located.
- Country/region: The two-letter country code (e.g., US for the United States).
- Fill in the requested information:
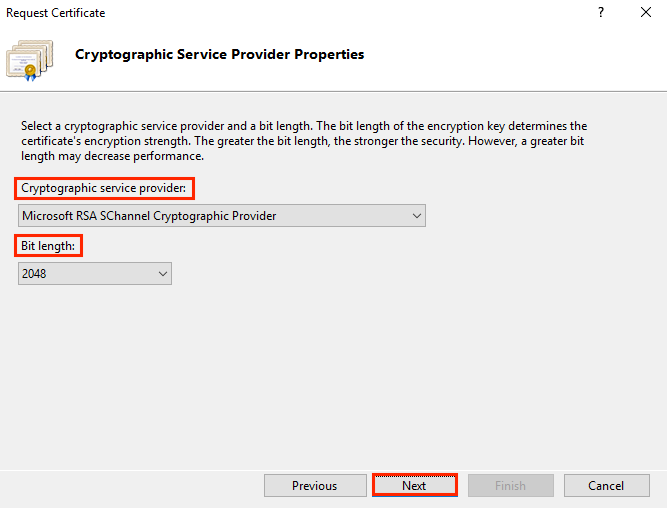
- Cryptographic Service Provider Properties:
- Select
Microsoft RSA SChannel Cryptographic Provider. - Choose a bit length of
2048(recommended).
- Select
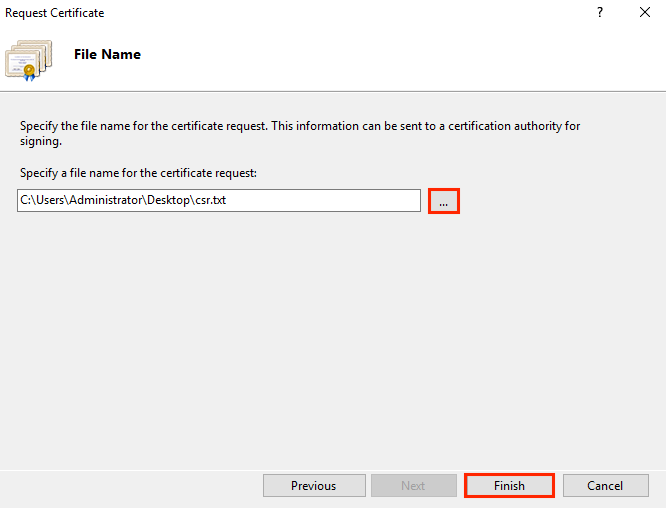
- Save the CSR:
- Choose a location to save the CSR file and click
Finish.
- Choose a location to save the CSR file and click
Step 2: Submit the CSR to a Certificate Authority (CA)
- Submit the CSR:
- Go to your chosen Certificate Authority’s website and submit the CSR file to request an SSL certificate.
- Verification:
- The CA will verify your information. Follow their instructions for domain and organizational validation.
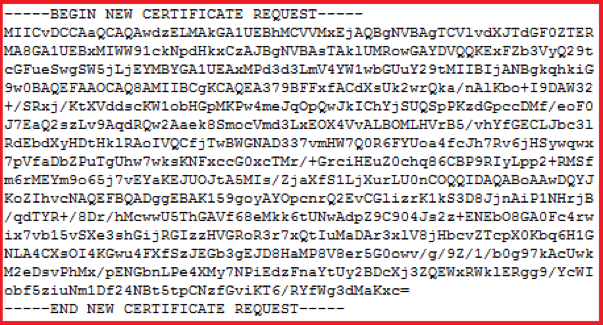
- Download the SSL Certificate:
- Once the CA has issued the certificate, download all provided files, including the primary certificate and any intermediate certificates.
Step 3: Install SSL Certificate on Windows Server
- Open IIS Manager:
- Click
Start, typeinetmgr, and pressEnter.
- Click
- Select the server name:
- In the
Connectionspanel, click on your server’s name.
- In the
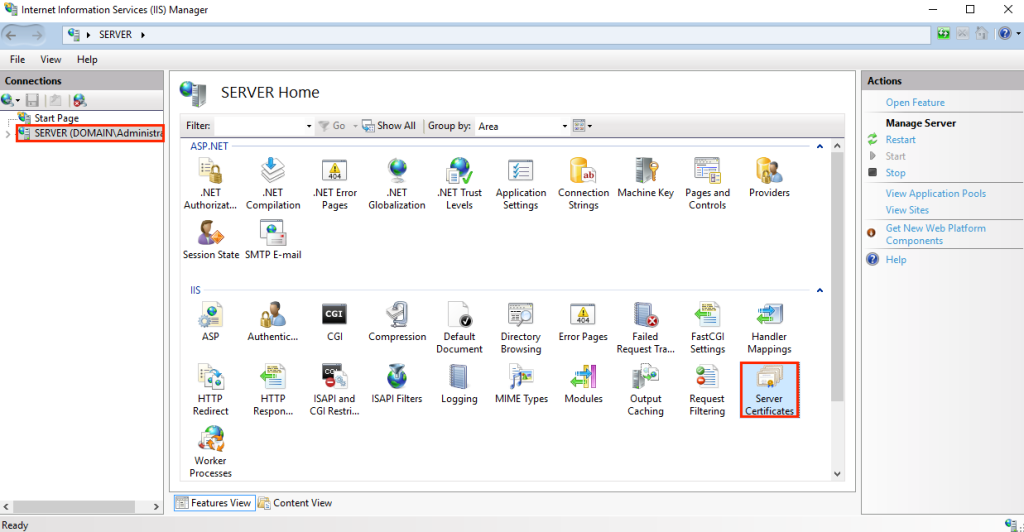
- Open Server Certificates:
- Double-click on the
Server Certificatesfeature.
- Double-click on the
- Complete Certificate Request:
- In the
Actionspanel, clickComplete Certificate Request.
- In the

- Browse to the location where you saved the certificate file.
- Enter a friendly name for the certificate (this is an internal identifier).

- Install Intermediate Certificates:
- If your CA provided intermediate certificates, you need to install them. This can be done through the Microsoft Management Console (MMC).
Step 4: Bind the SSL Certificate to Your Website
- Open IIS Manager:
- Click
Start, typeinetmgr, and pressEnter.
- Click
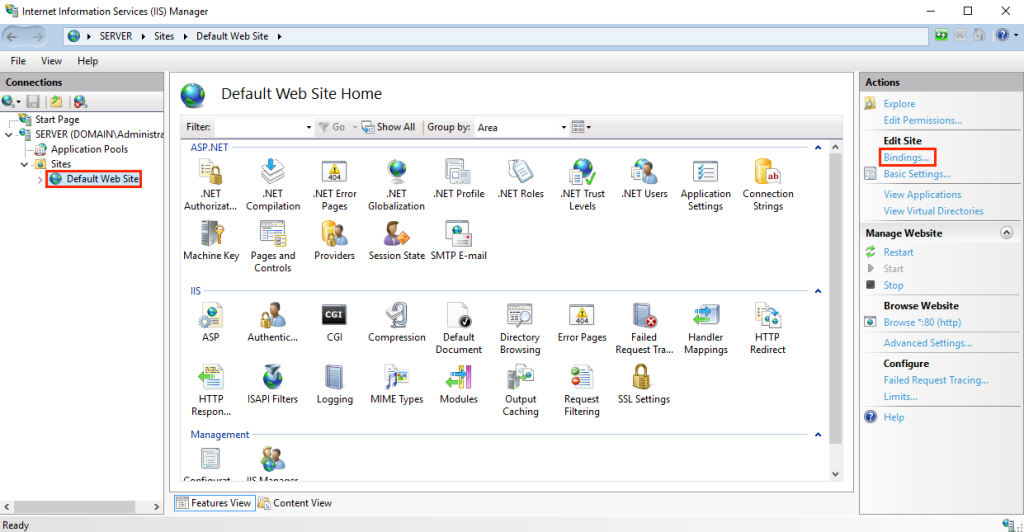
- Select the website:
- In the
Connectionspanel, expandSitesand select the site you want to secure.
- In the
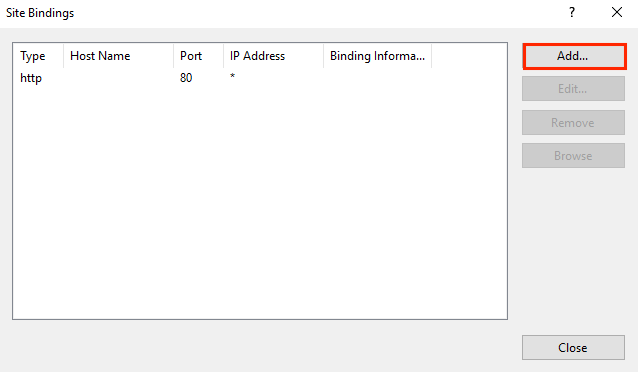
- Edit Site Bindings:
- In the
Actionspanel, clickBindings. - Click
Addto create a new binding.
- In the
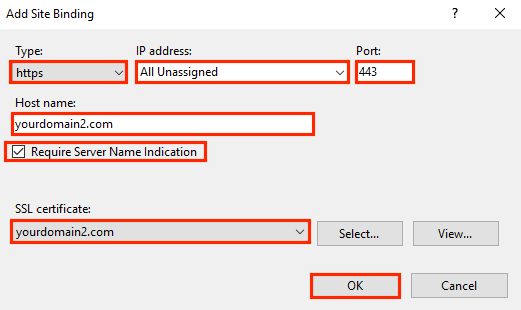
- Add HTTPS Binding:
- Set
Typetohttps. - Select the IP address (or leave as
All Unassignedif applicable). - Set
Portto443. - Select the SSL certificate you installed from the
SSL Certificatedropdown.
- Set
- Apply and Close:
- Click
OK, thenClose. to install SSL Certificate on Windows Server
- Click
Step 5: Test the SSL Certificate
- Restart IIS:
- In the
Actionspanel, clickRestartto restart IIS.
- In the
- Verify the Installation:
- Open a web browser and navigate to your site using
https://. Verify that the SSL certificate is properly installed and that the browser shows a secure connection.
- Open a web browser and navigate to your site using
Troubleshooting Tips
- Intermediate Certificates: To install SSL Certificate on Windows Server Ensure that all intermediate certificates are installed properly. Missing intermediate certificates can cause SSL errors.
- Certificate Chain: Use online tools like SSL Labs’ SSL Test to verify that the certificate chain is correctly configured.
- Firewall Settings: To install SSL Certificate on Windows Server Ensure that port 443 is open in your firewall settings to allow HTTPS traffic.
By following these steps can install SSL Certificate on Windows Server, you should be able to successfully install SSL Certificate on Windows Server and configure an SSL certificate on your Windows Server. If you encounter any issues, refer to the documentation provided by your Certificate Authority or seek assistance from your server administrator.