
Upgrade/Downgrade cPanel Accounts in WHM is an essential task for server administrator and resellers managing multiple hosting accounts. It allows you to adjust the hosting plan of an account to better match a client’s needs, whether it’s increasing resources (upgrading) or reducing them (downgrading). Here’s a detailed guide on how to perform this action efficiently.
Table of Contents
What You Need Before Starting
- Access to WHM: Ensure you have the credentials to log in to WHM, either as a root user or a reseller with sufficient permissions.
- Hosting Packages Defined: Hosting plans or packages must already be set up in WHM with appropriate resource allocations (disk space, bandwidth, email accounts, etc.).
Steps to Upgrade/Downgrade cPanel Accounts in WHM
Step 1: Log In to WHM
To begin, access the WHM interface:
- Open a browser and navigate to WHM using your server’s IP or hostname, such as
https://your-server-ip:2087. - Enter your WHM credentials (root or reseller username and password).

Once logged in, you’ll be directed to the WHM dashboard, where you can access various account management tools.
Step 2: Locate the Account Functions Section
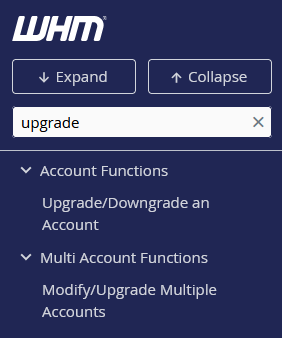
- In the WHM menu on the left, scroll down or use the search bar to find Account Functions.
- Click on Upgrade/Downgrade an Account from the list of available options.
Step 3: Select the Account

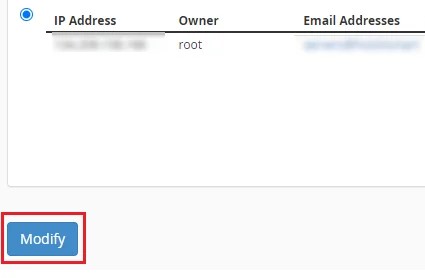
- You’ll see a list of all the cPanel accounts hosted on the server. Each account will be listed with its username, primary domain, and current package.
- Use the search bar to quickly locate the specific account you want to modify.
- Click on the account you wish to Upgrade/Downgrade cPanel Accounts in WHM and then click the Modify button.
Step 4: Choose a New Package
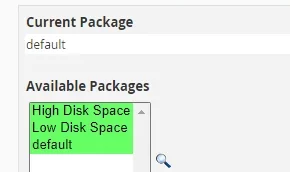
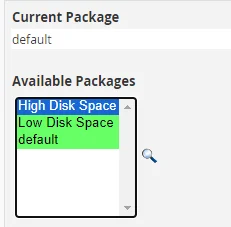
- Once you select an account, WHM will display a list of available hosting packages. These packages represent predefined sets of limits and features.
- For an upgrade, choose a package with higher limits (e.g., more disk space, bandwidth, or email accounts).
- For a downgrade, select a package with reduced limits.
- Carefully review the package details to ensure that the selected package meets the account’s requirements.
Step 5: Confirm the Change
- After selecting the new package, click Upgrade/Downgrade cPanel Accounts in WHM to apply the changes.
- WHM will process the request and reassign the account to the new package.

Step 6: Verify the Changes
- Once the change is complete, you’ll see a confirmation message in WHM.
- To ensure the changes were applied correctly, you can:
- Check the account’s details in WHM under List Accounts.
- Log in to the associated cPanel account to confirm resource updates.
Things to Keep in Mind
- Resource Availability: Ensure your server has sufficient resources to accommodate the new package if you are upgrading.
- Impact on Account Features: Downgrading an account might restrict some features or services, such as reducing email accounts or disk space. Ensure these limits won’t disrupt the client’s website or operations.
- Client Communication: Inform clients about any changes to their hosting plan and provide details about their new limits or features.
- Backups: Before performing a Upgrade/Downgrade cPanel Accounts in WHM, it’s a good idea to create a full backup of the account to prevent data loss in case of any issues.
Advantages of This Feature
- Flexibility: Easily adapt hosting plans to the evolving needs of clients.
- Efficiency: Saves time compared to manually adjusting settings for each account.
- Control: Centralized management of accounts and resource allocation ensures optimal server performance.
By following these steps, you can Upgrade/Downgrade cPanel Accounts in WHM effortlessly. This functionality is critical for maintaining client satisfaction and ensuring that your server resources are efficiently utilized. Proper planning and regular communication with clients will further enhance the management experience.